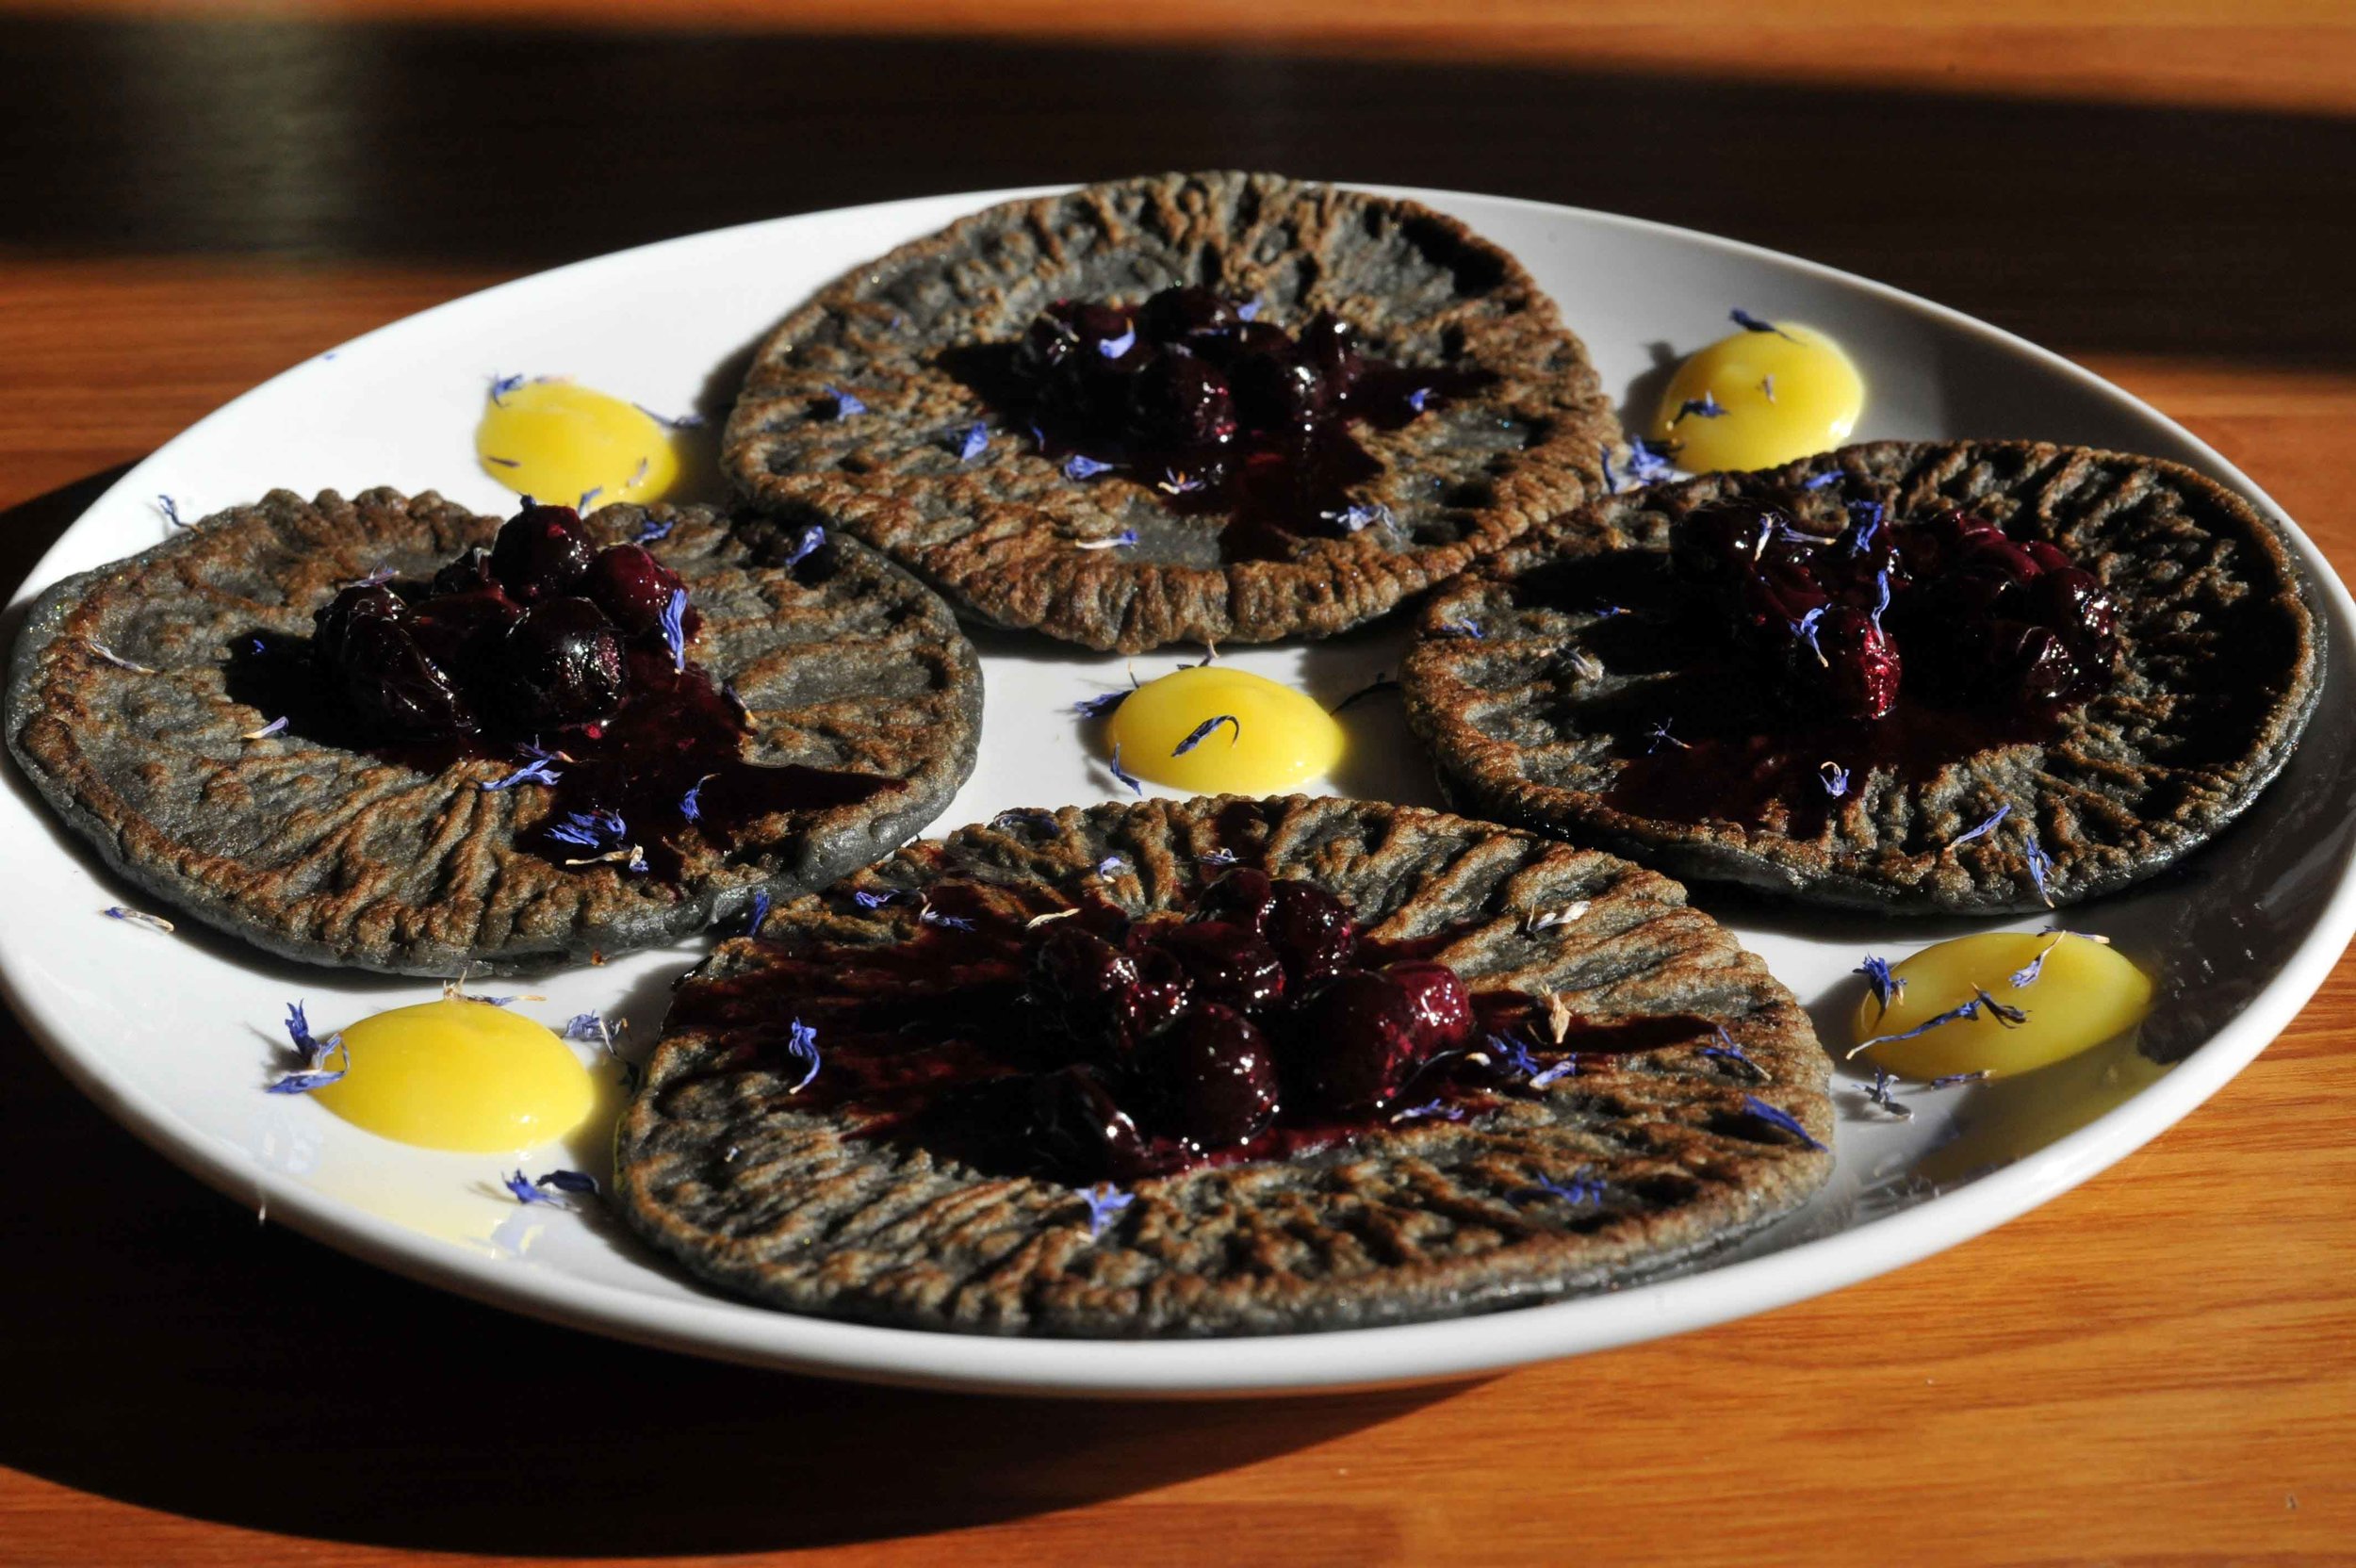
Charcoal Pancakes Recipe with Blueberry Compote, Lemon Curd and Cornflowers

charcoal pancake shadows.jpg

Sunny Sundays make the best days for pancakes and even more the better when you have freshly made blueberry compote and lemon curd to dress them with. With my craving for pancakes and the notion that Pancake Day is crepe-ing (sorry!) up on us, I remembered I had promised to share this recipe…then I remembered I made a whole podcast episode about pancakes!

For a full breakdown of the food history of pancakes and pancake food art go to Smy Goodness Podcast Ep5 - Pancakes and Creativity with Aimee Furnival of Another Studio. There is art from Rembrandt, Hieronymus Francken the Younger, a 1585 recipe for pancakes from The Good Huswifes Jewell and a breakdown of the evolution of the Mammy iconography behind Aunt Jemima. Click link above to see all the images or listen while you make your own pancakes here:

Why add charcoal you might ask…well the charcoal is because I like the texture and benefits of occasionally adding edible activated charcoal to mostly cakes, canapes cases and biscuits. Charcoal can act as a detoxifier, is good for kidney health, gastrointestinal health, has been used as a water filterer for always and I add it to my daily facial cleanser that I make along with bentonite clay, which I also occasionally add to recipes. I am not a doctor or nutritionist so you should do your own research to see if it is something you are interested in ingesting or using, sharing with your family and friends and if you are taking medicines you should always check with your doctor first.

Now for the recipe! The recipe works just fine with or without the charcoal and I like the contrast of the pancakes made with and without adding charcoal to the batter. My pancake recipe is one I have been using for a very long time that is kind of a hybrid of Delia Smith’s pancake recipe and Linda McCartney’s pancake recipe with the offshoot being almost in between a crepe and an American style pancake. It’s not as eggy as a crepe and it’s not as fluffy or thick as an American style pancake. It’s got texture, density and a buttery goodwill to soak up whatever fruit, preserves, syrup or savoury items that you might ever want to top it with.

Charcoal Pancakes
100g plain flour or 1 cup plain flour
150ml almond or any milk or 2/3 cup of almond or any milk
1 egg
30-50g butter (15-25g for batter, 15-25g for cooking) 0r 2-4 Tbsp of butter
1 tsp activated charcoal
pinch of salt

makes 4-5 12 cm (5inch) pancakes
simply double or treble the batch as needed

Charcoal pancake batter, dried cornflowers, lemon curd and blueberry compote - Smy Goodness

Charcoal pancake batter, dried cornflowers, lemon curd and blueberry compote - Smy Goodness

  1. Sift or dry whisk your flour plus the activated charcoal and pinch of salt in a mixing bowl.

  2. Melt half your butter in the same skillet or pan you will make the pancakes in being sure to not overcook it, you want it just melted then remove from heat.

  3. Measure your milk in a glass measuring jug and then add egg and melted butter and whisk well. You can also do his step in a bowl and then transfer back to a measuring jug which will make pouring your batter into the pan easier, avoid spillage and you get a lovely pattern of browning on your pancakes this way. Or use a soup ladle from the bowl to pan.

  4. If possible you can then let your batter rest for an hour or so but this step is not essential.

  5. Preheat your cast iron griddle or pan to medium to medium high heat. As you continue t cook your pancakes you may need to slightly adjust the heat a little up and a little down to get your pancakes just how you like them.

  6. Put a bit of butter in the pan and let sizzle and melt, then quickly pour enough batter so that it spreads nicely and is manageable to turn over. I usually go for 10-15cm circles of batter. The sides will start to bubble and brown and the batter will start to change in colour a bit as it cooks underneath starting from the outer edges going in towards the middle. I usually wait until the batter has visible cooked underneath and the edges are lightly browned and then flip or turn. If you turn to quickly or not soon enough it’s no bother. I always make the first pancake a bit smaller and eat it as a taster to make sure I haven’t: a) made any silly measuring mistakes b) the first pancake is always a sacrificial pancake that isn’t is good as the rest and gives me an opportunity to fine tune the heat levels in the pan. c) acts as fuel for me for the time frame between when I cook up the rest of the batter and serve them all up!

  7. You can keep your pancakes warm as you cook through a myriad of ways - I feel like I have tried them all but am always open to suggestions! I either keep the oven on a low or ‘warming’ setting and as you make them place them on a plate in the oven with a bit of aluminium foil over your pancakes which will keep them warm. When ready serve them all together keeping in mind to protect your table and little hands from the warm plate. I have also tried a sort of bain marie type technique with a plate over a pan of water on a low heat and place your cooked pancakes on the plate with a bit of aluminium foil over the top. I think this does keep them nice and warm but it can sometimes end up continuing the cooking process. OR cook and serve them right away or with a big ole griddle or pan you can have several on the go at once in a symphony of pancakes and pancakes sizzling and turning.

I love fruit and Smy preserves on pancakes. My favourites are bananas and honey and most notably my Smy Goodness lemon curd and blueberry compote. Both are available in small batches and I usually make a few jars a month or special orders as they have a shorter shelf life than all my flavours. You can easily make your own blueberry compote by throwing a punnet of blueberries in a pan before you start your pancakes and add the juice of half a lemon or orange, some zest, some honey - heck, I even sometimes add a dash of brandy in there. Let it cook, stirring occasionally and don’t let it burn but allow it to go all glisten-y and rich while you are cooking your pancakes. When your breakfast has come together you can always hit it with a final bit of heat before putting it in a little jug or serving bowl for you and your guests to put warm spoonfuls over their warm pancakes. How do you like your pancakes?

For more info all about pancakes listen to Smy Goodness Podcast Ep5 - Pancakes & Creativity with Aimee Furnival of Another Studio. Aimee and I are long time pancake collaborators.

my Goodness pancake brunch - photo by @elcidre

my Goodness pancake brunch - photo by @elcidre

pancake front side.jpg
Pancake Print by Smy Goodness

Pancake Print by Smy Goodness

Cheese Toasties!!!


The meats and cheeses of the Church of Cheese and the preserves of Smy Goodness are being folded together and pressed until golden brown in the form of heavenly cheese toasties. They are perfect on a chilly day because, well - hot cheese. Just a few of the cheese toastie flavours of the day include:

  • Salame Napoli mature cheddar cheese and apple and pepper chutney
  • Speck, gorgonzola and quince chutney
  • Schiaciatta piccante, pecorino w/chilies and six-pepper jelly
  • Portabello mushrooms, brie and red onion marmalade


Quince/Apple & Polenta/Pistachio Crumble w/ Quince Ice Cream & Membrillo Shavings


Here is a re-experimentation created in an effort to make a slightly lighter crumble as well as to use lots of my quince preserves, in this case quince jam and membrillo. I always make the ice cream beforehand or the day before for one less step to complete on the day. If you don't have a jar of Smy Goodness or another type of quince jam you could make vanilla ice cream or serve with a good quality vanilla ice cream or frozen yoghurt. I had also made the membrillo about a month prior to this pudding but you could also buy ready made membrillo or omit it all together
CRUMBLE RECIPE
Ingredients

1 quince
2-3 apples
100g polenta
100g plain flour
100g butter, room temperature
70g sugar
handful of pistachios - finely chopped

Method

  1. Preheat the oven to 150°C.

  2. Lightly butter an ovenproof dish, I use one that is 15cm x 20cm. For a larger dish you may want to double the recipe.

  3. Peel, core, quarter and roughly chop the quince. Place the quince in an ovenproof dish top with 1 Tbsp of the sugar and shake to distribute and then place in the oven for 20 minutes. This will give the quince a head start as it requires a longer cooking time than the apple.

  4. Prepare the crumble topping by sifting the flour on to the top of the polenta. Add the sugar and chopped pistachios to the flour and polenta and stir well to mix.

  5. Add the butter and rub with clean fingertips to incorporate the butter throughout the dry ingredients until you have a crumbly texture that when pinched together will adhere to itself in clumps.

  6. Peel, core, quarter and roughly chop the apples into chunks.

  7. Remove the quince from the oven and immediately increase the heat to 180°C, add the apple to the quince and stir to distribute well. Be sure to use an oven glove and give the pan a shake so that the fruit levels out within the dish.

  8. Spoon the crumble topping on to the fruit until it has completely covered the fruit. Gently pat the crumble topping for a more compact topping.

  9. Return the dish to the oven and cook for 25-35 minutes or until the topping has gone golden brown. Remove from oven and allow the crumble to rest before serving.

QUINCE ICE CREAM RECIPE
Ingredients

200g milk
200g double cream
4 egg yolks
1 jar of Smy Goodness quince jam
vanilla seeds from half a vanilla bean or 1/2 tsp of organic vanilla extract
small pinch of salt

Method

  1. Place the milk and vanilla seeds into a pan. Turn the heat to medium but do not allow the milk to boil. Once the edges of the milk start to bubble remove it from the heat and allow it to cool.

  2. In a bowl or jug blend together the quince jam and egg yolks and salt.

  3. Once combined slowly stir in the double cream and beat until well combined.

  4. Now add the cooled down milk to the mixture and stir until completely blended.

  5. Add the mixture to an ice cream maker and follow directions. I have used a Gaggia and a Magimix

ASSEMBLY
S
erve a portion of the crumble on a plate or bow alongside a scoop of the ice cream and top the ice cream with very thin slices of membrillo.

Quince_o__Clock_I_turned_a_jug_of_extracted_quince_pectin_into_a_pattern.__pattern__quince__instafood__instaart__instafoodart__jugs.jpg

Above left are jars of quince jelly and a quince cordial that I made. On the right is a pattern/print that I made from a photo of extracted quince pectin in a jug.

Quince, freesias and the crumble and ice cream.


Banana & Apricot Compote Muffins

 
Banana & apricot compote muffin ingredients

Banana & apricot compote muffin ingredients

The bananas above needed using up so I whipped together another recipe for muffins where the sugar was replaced with a Smy Goodness compote, in this case Smy Goodness apricots compote. The compote adds moistness and flavour to the muffins without them being overly sweet.

Banana  & Apricot Compote Muffins Recipe

Ingredients: 

  • 100g organic spelt flour
  • 100g organic plain flour  
  • 100g organic butter
  • 275ml apricot compote (or any flavour jam/compote) 
  • 2 medium ripe bananas
  • 1 egg
  • 2 tsp baking powder
  • 1 tsp organic vanilla

Instructions  : 

  1. preheat the oven  to 210°C and lightly grease a muffin tray.
  2. Mix and blend the butter, compote, bananas, egg and vanilla. 
  3. Sift and flours and baking powder together.
  4. Fold the sifted flour and baking powder into the blended wet ingredients a bit at a time until completely blended together.
  5. Add a heaped tablespoon of the mixture into cases or muffin tray and then go back and add a bit of the mixture to each muffin case or tray until they are as equal as possible. The recipe will make 12-14 muffins. 
Sifted spelt and plain flour and baking powder

Sifted spelt and plain flour and baking powder

Banana, butter, apricot compote, vanilla and egg

Banana, butter, apricot compote, vanilla and egg

Combined wet ingredients

Combined wet ingredients

Mixture ready for muffin cases

Mixture ready for muffin cases

image.jpg
 

Beetroot Brownies made with Beetroot Jam

 
Beetroot Brownie

Beetroot Brownie

the beetroot brownie ingredients

the beetroot brownie ingredients

 
agave syrup

agave syrup


Last year I started making beetroot jam since I am obsessed with beetroot and probably eat it at least once a day. I did not want the beetroot jam to be overly sweet since the beetroot itself has so much natural sweetness. Last year I had also made a beetroot and black carrot cake that was so moist I immediately started plotting a beetroot preserve that I could have at the ready to add to cakes and brownies for added moisture. For this brownie recipe I endeavored to not add sugar but use only the Smy Goodness Beetroot Jam and a bit of agave syrup. If you do not have any beetroot jam to hand you can peel and boil 2 medium beetroot, allow to cool and grate into 4 tbsp of agave syrup. It was an experiment that I am pleased was successful. The resulting brownies were moist, rich, dense, not too sweet, with a perfect shiny brownie crust and had an additional texture pop of beetroot that will have me coming back to this recipe in the near future.

Beetroot Brownie Ingredients

  • 275g Smy Goodness Beetroot Jam (*If you do not have any beetroot jam to hand you can peel and boil 2 medium beetroot, allow to cool and grate into 4 tbsp of agave syrup. If you do not have agave syrup you can use 100g of caster sugar)
  • 200g organic plain flour
  • 200g organic butter
  • 3 eggs
  • 50g organic cocoa powder
  • 30g walnuts roughly chopped
  • 1 Tbsp agave syrup (*use 1 Tbsp caster sugar if you do not have agave syrup)
  • 1 tsp organic vanilla bean extract
  • pinch fine sea salt

Beetroot Brownie Instructions

  1. Preheat the oven to 180°C/200°C fan assisted.
  2. Prepare a 20cm x 20cm square tin with baking paper.
  3. Cream the butter and the beetroot jam (*If you do not have any beetroot jam to hand you can peel and boil 2 medium beetroot, allow to cool and grate into 4 tbsp of agave syrup. If you do not have agave syrup you can use 100g of caster sugar).
  4. Add the eggs to the mixture and blend thoroughly.
  5. Add the cocoa to the mixture and blend thoroughly.
  6. Add 1 Tbsp agave syrup to the mixture and blend thoroughly (*use 1 Tbsp caster sugar if you do not have agave syrup).
  7. Add the walnuts to the mixture and blend thoroughly.
  8. Spread the mixture evenly into the tin lined with baking paper.
  9. Place in the middle of the oven for 30-35 minutes. Do not allow the top to burn. Test the middle of the brownies with a toothpick, if it comes out clean it is ready.
  10. Use the baking paper to remove the brownies from the tin and allow to cool on a cooling rack. Slice into desired sized brownies and enjoy.
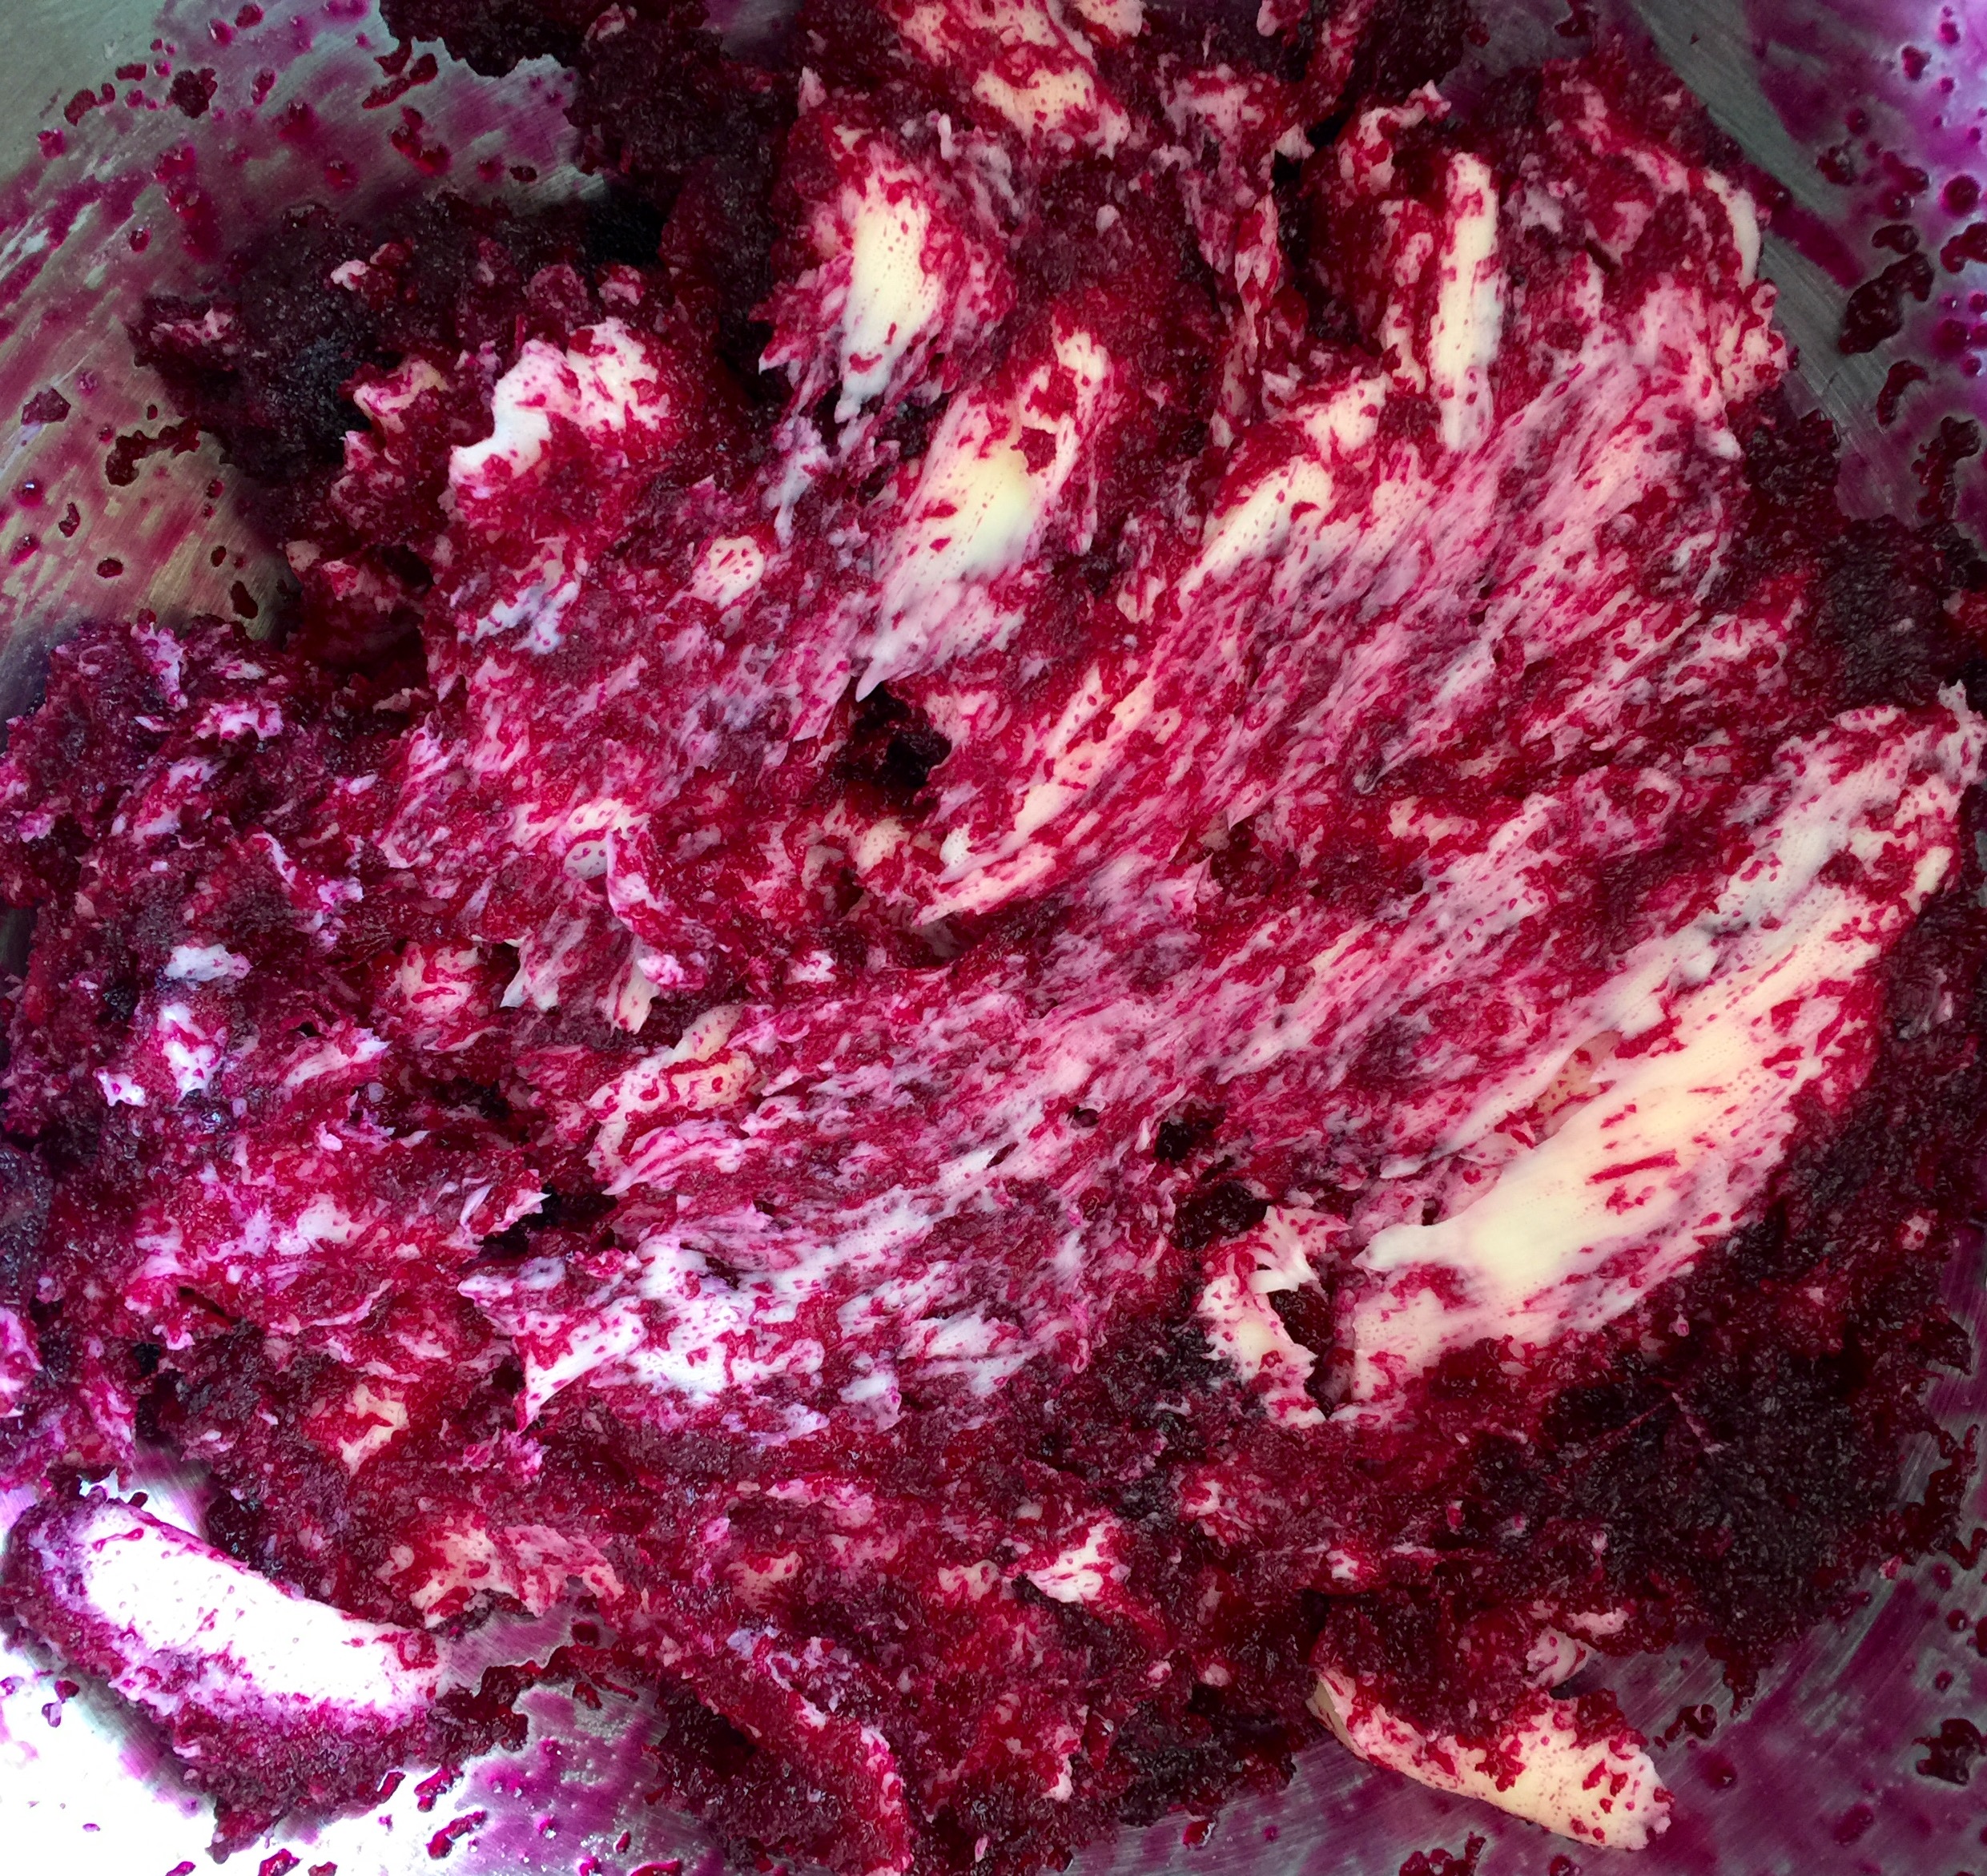
creaming the beetroot jam and butter

creaming the beetroot jam and butter

adding the eggs to the mixture

adding the eggs to the mixture

adding the organic cocoa to the mixture

adding the organic cocoa to the mixture

adding the agave syrup to the mixture

adding the agave syrup to the mixture

brownies about to go in the oven

brownies about to go in the oven

baked brownies

baked brownies


Curries - Wk 3 - Healthy Eating Fast Food/Takeaway Alternatives


For the third week of our six-week Healthy Eating Fast Food/Takeaway Alternatives course we made a vegetarian curry and a mango chutney. Each week we always have a vegetarian option but this week we opted to go all vegetarian. A combination of an overly large pan, an electric stove and baby tomatoes left this recipe rather dry and we were glad for our mango chutney that we had made but I have tweaked the recipe a bit or if you prefer a dryer curry you can omit the vegetable stock. I recommend getting the mango chutney made first and put to the side or do all the prep of the ingredients for both the vegetable curry and mango chutney and make then side by side. The vegetable curry can easily have meat, seafood or tofu added to it

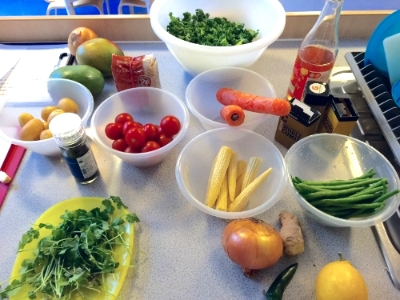
ingredients for vegetarian curry

ingredients for vegetarian curry

Indian remains one of the most popular takeaway meals in the UK and in London we are spoilt with amazing Indian takeaway and restaurant options at all price points. Whilst working on Brick Lane I could not muster up the self control to not walk the twenty paces from where I worked to Ambala where I would eat three samosas a day as a late afternoon snack. I never even considered how many calories or grams of fat were in each samosa and when I researched this I was really surprised to see that I had been adding almost 500 extra calories and 25 grams of fat each day. I'm still unable to be near an Ambala and not get samosas but now I have it as a treat and limit myself to one meat and one veg samosa instead of my minimum three. Here are some more average amount of calories and grams of fat (respectively) in Indian takeaways:

Chicken Biryani - 1000 cal, 43 grams of fat
Chicken Korma - 860 cal, 50 grams of fat
Lamb Rogan Josh - 650 cal, 37 grams of fat
Vegetable Jalfrezi - 460 cal, 30 grams of fat
Garlic naan the whole naan - 760 cal, 25 grams of fat
Onion bhaji - 2 bahjis - 450 cal, 25 grams of fat
Poppadoms - 2 poppadom - 70 cal, 5 grams of fat
Meat or veg samosa - 1 samosa - 145 cal, 8 grams of fat

Indian Takeaway tips:
Many dishes are loaded with oil, ghee and fat and with pilau rice, starters and side dishes, Indian takeouts can quickly end up meeting and going beyond your daily recommended allowances and not is a healthy way at all.

Avoid the creamier based reamy curries like masala and korma which are higher in calories and fat. Tomato based curries like jalfrezi, rogan or madras are a better choice, or opt for dry dishes like biryanis. Some ways to make substitutions and save on calories include choosing plain boiled rather than pilau, chappati rather than naan, choosing veggie curries and opting out or reducing the number of fried starters such as samosas and bhajis.

  1. Vegetable Curry Recipe

INGREDIENTS
500 g vegetables i.e.-cauliflower, green beans, carrots, aubergine
200 g potatoes, peeled and cut into 1 cm squares
6 tomatoes, chopped finely or a tin of tomatoes
2 onions - thinly sliced into crescents
300 ml vegetable stock
4 tbsp coconut oil, canola oil or alternative oil
2 cloves garlic - finely chopped or minced
1 tbsp fresh ginger root, peeled - finely chopped or minced
1 tsp cumin seeds - if you do not have cumin seeds you can use ground cumin
1 tsp ground coriander
1/4 tsp garam masala
1/4 tsp turmeric
1/4 tsp paprika
2 pinches of sea salt
1/4 tsp freshly ground pepper - or more if desired personal taste
Fresh coriander - washed handful, roughly chopped
Fresh lemon juice from half a lemon - strained to remove seeds

INSTRUCTIONS

  1. Prepare the vegetable stock by either warming homemade vegetable stock or use a high quality powdered stock that is free from additives or MSG.
  2. Toast the cumin seeds in a pan under medium heat while constantly stirring with a wooden spoon for 3 minutes making sure that the seeds do not burn. Grind the toasted cumin seeds and add all the readily ground spices into a small bowl ready to add later on in the recipe.
  3. Warm the oil in a large pan at medium heat and add the onions and cook slowly until transparent. Do not let them brown or dry out, add a spoonful of the vegetable stock should the onions start to dry out or brown.
  4. Add the ginger and garlic and cook for one minute, stirring all the while. Reduce the heat or add a spoonful of the stock should the garlic and ginger and start to brown, do let them burn.
  5. With the pan at medium heat, stir the ground spices into the onions, garlic and ginger and keep stirring until they are thoroughly mixed in, about three minutes.
  6. Now add the tomatoes and stock and keep stirring until everything is mixed together well, about 5 minutes.
  7. Add the vegetables and stir to mix throughout, cover and cook on low to mediumheat for 30 minutes or until vegetables potatoes are thoroughly cooked to desired texture. Stir in fresh lemon juice and fresh coriander, stir and serve with brown rice.

Quick Mango Chutney Recipe

INGREDIENTS
1 mango chopped into small irregular pieces
1/4 onion finely chopped or minced
1/2 - 1 chili - depending on personal taste - de-seeded and finely chopped
150 ml cider vinegar
100g sugar
1/2 tsp cumin
1/2 tsp coriander
pinch of salt

INSTRUCTIONS

  1. Combine the sugar and cider vinegar in a pan over medium heat until the sugar is dissolved.
  2. Add the mango pieces to the mixture and stir.
  3. Add the spices and salt and increase heat stirring all the while.
  4. Once the mixture has been boiling for 3-5 minutes, reduce the heat to low, stir occasionally to avoid burning and allow the chutney to thicken which should take 15 -30 minutes.
  5. Once the chutney is at the desired thickness remove it from the stove and place in a glass container.
  6. This is a quick chutney recipe that is meant to be served while fresh alongside a curry and eaten right away or kept for a few days wrapped up and kept in a fridge.
 

Meringue-apés


winter berry meringue--apés

winter berry meringue--apés


mincemeat meringue-apés

mincemeat meringue-apés


Here are some little bite-size meringue-apés that I made. The top set are filled with a one-off compote of redcurrant, pomegranate and cranberries in a quince sauce while the bottom set are filled with Smy Goodness mincemeat. I love making meringues as a desert because they are delicious and best prepared the night before which means more time to focus on further cooking, drinking, hosting or all of the above. I had also made a set filled with lemon curd but they disappeared before I could photograph them. There will always be more meringue-apés, full size meringues and over-sized meringues as I have so many different delicious preserves to fill them with.

I recommend and use Delia Smith's recipe of 110g caster sugar and the egg whites of 2 large eggs. For these meringue-apés I used the whites of 6 organic large eggs and 330g caster sugar which yielded 40 meringues roughly 6cm in diameter. They were two-bite meringue-apés and obviously would have resulted in lots more bite-size meringue-apés. Preheat the oven to 150°C and prepare a baking tray lined with baking paper. Using a glass bowl you whisk the egg whites on a lower speed and increase the speed until the egg whites create stiff peaks. Then add in a heaped tablespoon of the caster sugar into the egg whites and whisk until combined and then repeat with another tablespoon until they are all gone and the mix has gone glossy with strong peaks and if your bowl is turned over the mixture stays put. I used an ice cream scoop to place evenly sized balls of the meringue-apés mix onto the baking paper and then used a teaspoon to make little depressions into the balls. For smaller sized meringue-apés a melon baller is perfect for even sized balls and then a knife can make a little hole in the mixture. Give up the ghost of getting them to all look identical, part of the charm is in their uniqueness and individuality with different peaks. Pop the meringue-apés in the oven and immediately reduce the temperature of your oven to 150°C and leave them in the oven for 30 minutes. After 30 minutes turn the oven off and leave them inside until the oven completely cools down. I tend to make my meringues in the evening and then leave them overnight to completely cool down. Just be careful to not forget them and then preheat the oven for something else the following day. You can store your meringues in an airtight tin for roughly a week or even freeze them but I do prefer to have made them a day earlier than I plan on eating them.

Meringue-apés are tasty, glamorous and a crowd-pleaser as they are fat-free, gluten free and you can mix and match what they're filled with to please the varied taste buds of your guests.


Dreaming of Marmalade Making


Soon it will be time to make Seville Orange Marmalade and I cannot wait. This year I plan on doing some experimentation on my usual recipe. The photo above is of a toast breakfast with fig and cherimoya from last year and also holds a clue to the intended experimentation. Until I get my hands on some Seville oranges I will be daydreaming and doodling as shown below.

 
IMG_3446.JPG


Six Pepper 'Tchup


Ketchup is not my favourite condiment by a long shot. I only really eat it with chips and even then not consistently. Heinz was founded in 1869 and had over 60 varieties of sauces and products on offer when in 1876 it began offering Heinz Tomato Ketchup. Ketchup were traditionally sauces made from other ingredients with mushroom ketchup being very popular in England. Since 1907 Heinz have become synonymous with "ketchup" when it began exporting it all over the world.

The ingredients list of Heinz ketchup is:  Tomato Concentrate , Distilled Vinegar, High Fructose Corn Syrup, Corn Syrup, Salt, Spice, Onion Powder, Natural Flavoring. The two types of corn syrup are worrying and my own mother looked down on ketchup and discouraged it but did not outright ban it. Parents attending a 6 week jam and chutney making course told me of their frustrations of their children wanting to add ketchup to all their food and worried about the syrup and salt levels. The following week we made a healthy alternative ketchup and the children loved the taste and the parents loved giving them a homemade option using fresh tomatoes with minimal amounts of sugar and salt. I was so impressed with the results that I decided to make my own version but the idea was overtaken by the business end of the summer fruit season.

Fast forward a year and there was a deal on tomatoes at Swiss Cottage Green Grocers that I couldn't resist and the memory of the tomato ketchup popped back into my mind. What I didn't count on was that the entire process would take me about twenty-four hours and that at the end of it when I shut my eyes I would see a psychedelic array of tomatoes like those above.

I roasted 9 kilos of tomatoes along with some onion and garlic with olive oil until they had carmelised and released their juice. Next was the most labour intensive part of the process; putting all the roasted ingredients through a passaverdura which separates the skin and seeds from the tomato flesh.


The countless cranks were worth it as the resulting paste from the passaverdura cannot be matched from sieving as it really does scrape every last bit of the tomato that you want in your sauce and leaves the rest.


Next up was to place all the tomatoes that had gone through the passaverdura into my trusty pot, well one of my trusty pots, and add a very secret seection of spices. The only sugar I added was about half a jar of six-pepper jelly to give it a bit of sweetness and a bit of heat. and let it simmer and thicken for about two hours. The resulting sauce is thick, tangy, spicy and flavourful but it's all about the tomatoes.

 
I_played_FrankenEms_today_and_created_a_new_flavour_six-pepper_jelly_ketchup__It_took_hours_deseedingskinning_with_a_passaverdura_but_the_flavour_is_well_worth_it___instafood__foodporn__tomato___smygoodness__sixpepperjelly__ketchup__glass__bottles__…
 

Twenty-four hours + 9 kilos of tomatoes = 5 x 250ml bottles of Six-Pepper 'Tchup. I have been enjoying the 'Tchup with eggs and invariably adding it to sauces and recipes. I'm not offering these jars for sale at the moment as I've already been through two of them and gave two away as Christmas presents. I will definitely make some more once tomatoes are back in season and the memory of cranking the passaverdura has faded. In the meantime I will be rationing the remaining bottle and trying my hand at some other traditional ketchup recipes, perhaps mushrooms or walnuts - watch this space.